• Skip to main content
  • Skip to primary sidebar
  • Skip to secondary sidebar
  • Skip to footer

Christian Preschool Printables logo

  • Bible Themes
  • Bible ABC
  • Bible Coloring
  • Bible Crafts
  • Bible Minibooks
  • Holidays
  • Shop

Theme

Fruit of the Spirit Printables for Kids

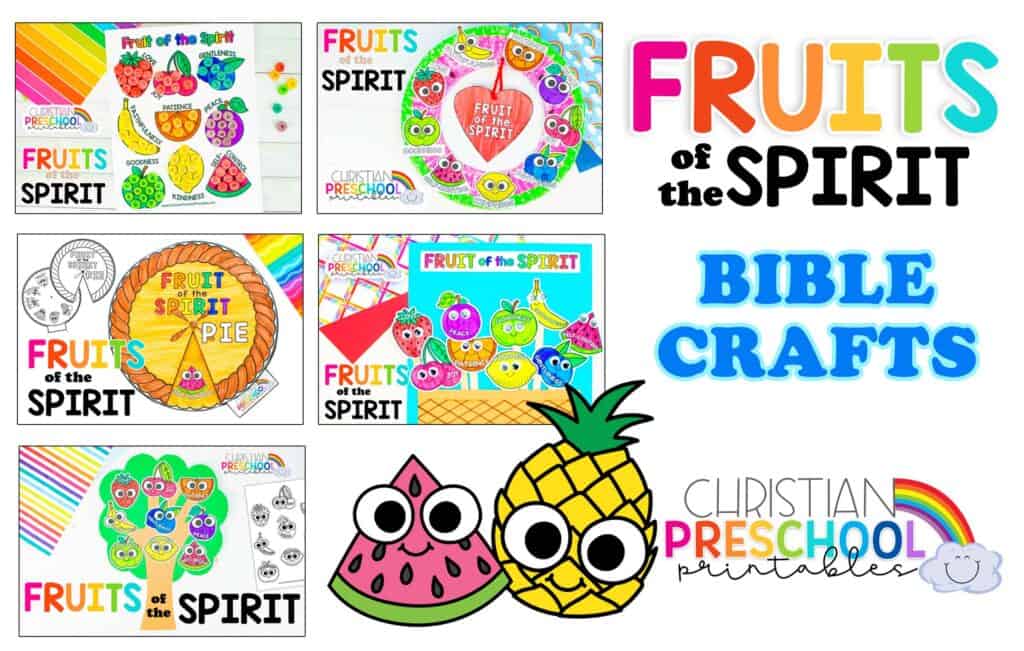
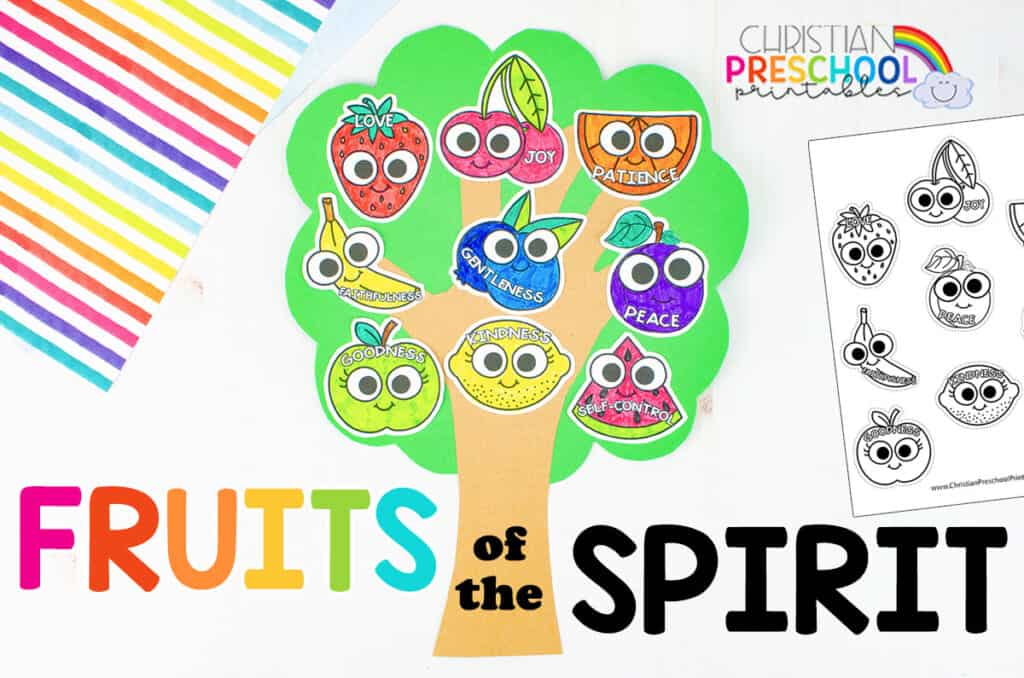
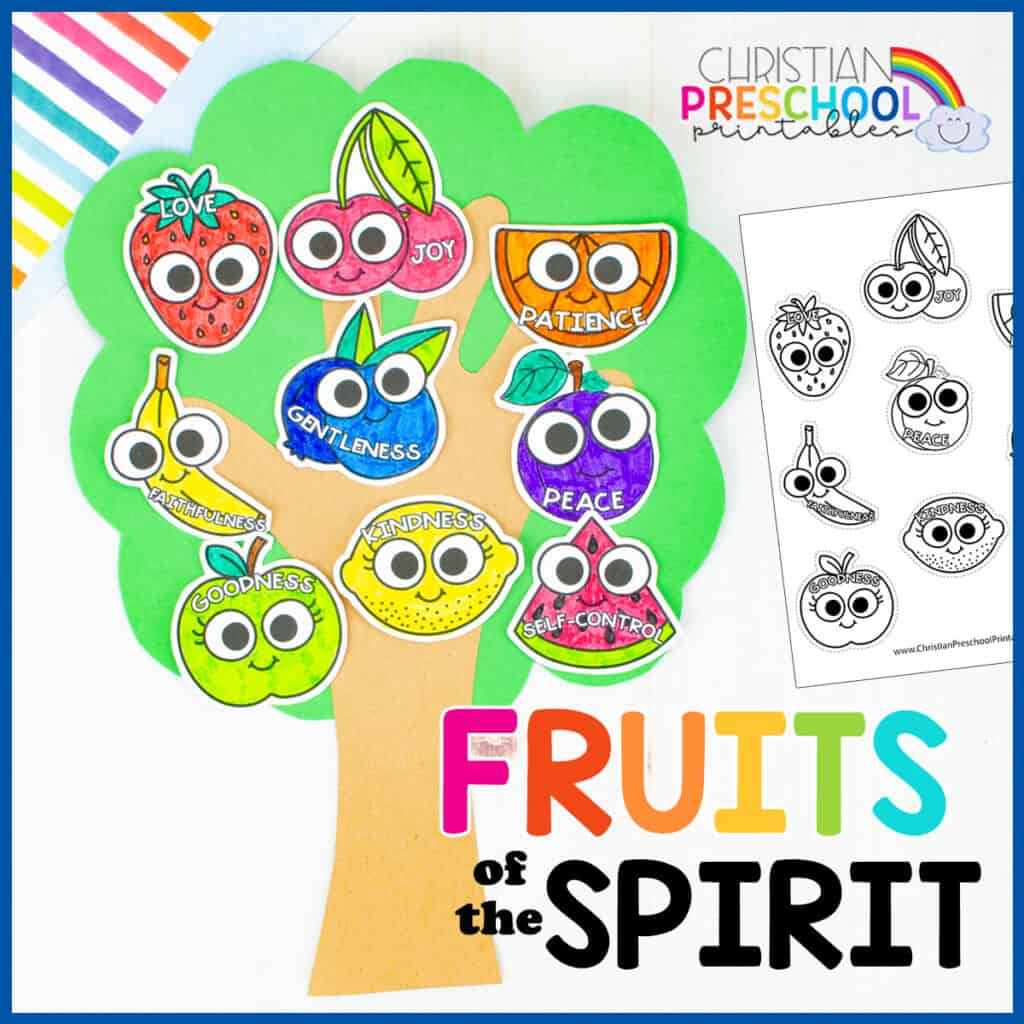
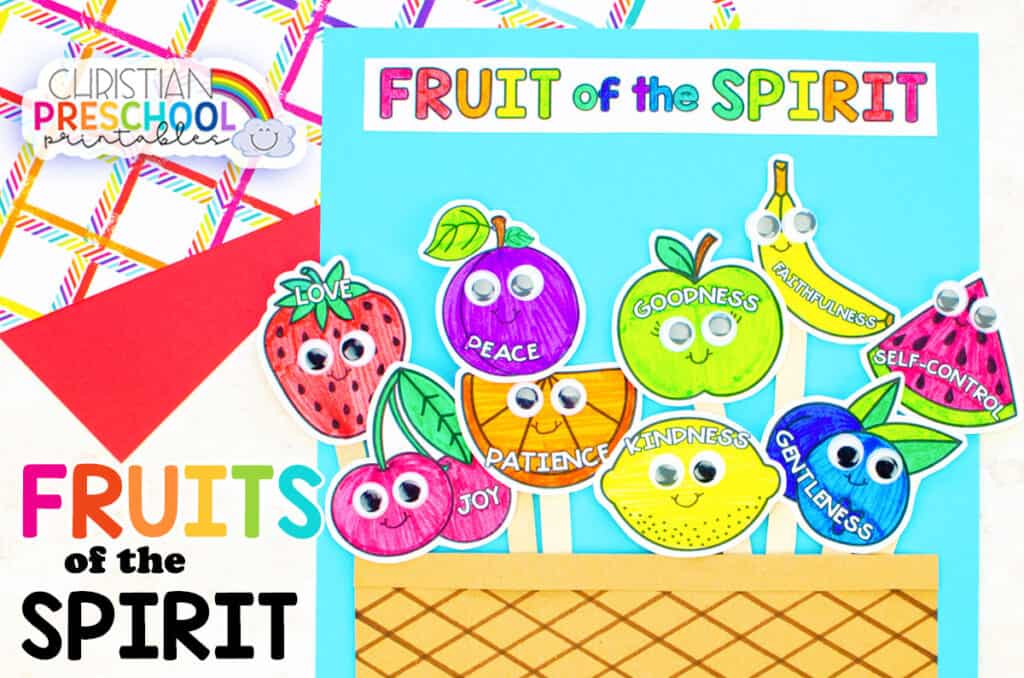
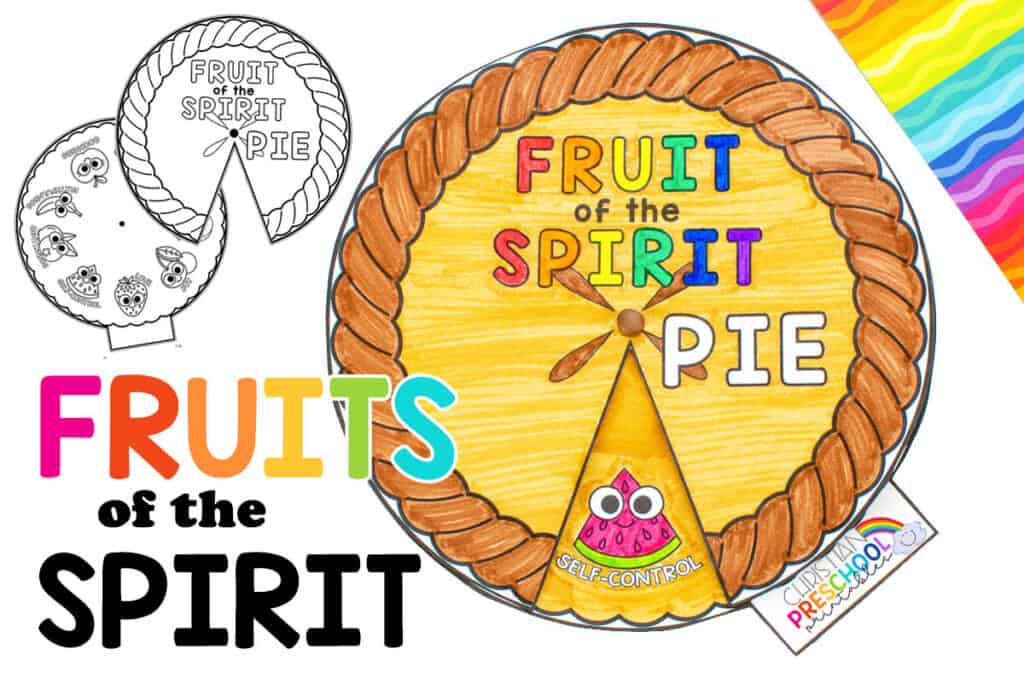
Our Fruits of the Spirit Printable Crafts are excellent bible crafts for many types of classes and environments. Whether you need a bible craft for a Sunday School lesson, VBS, or Homeschool unit study, this is a great hands-on lesson. We always keep our bible crafts low-prep and highly interactive for teachers and students.

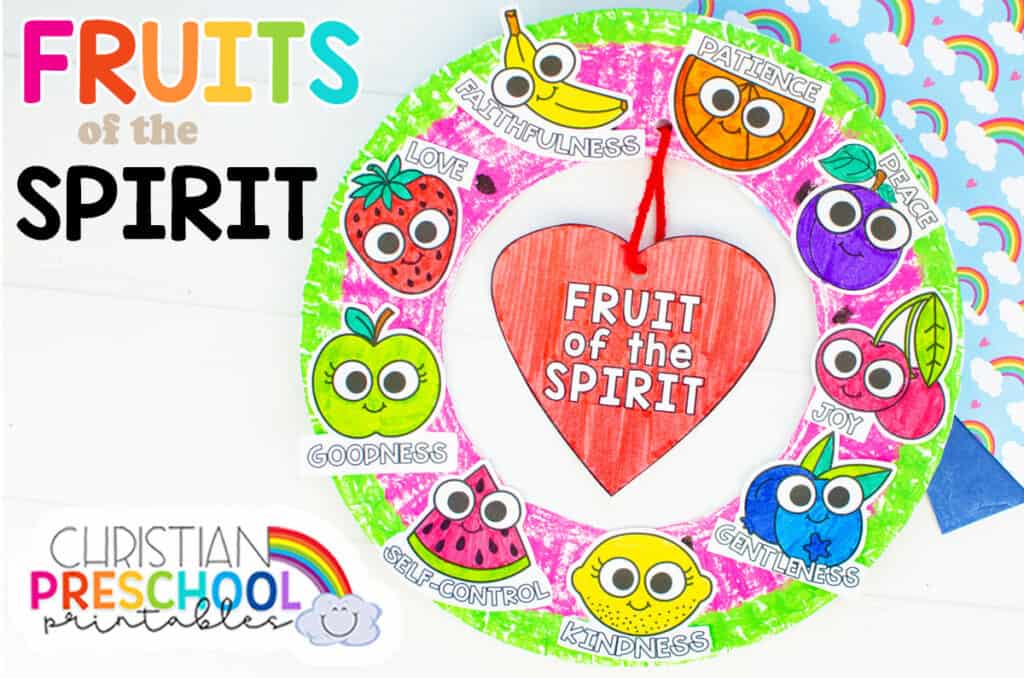
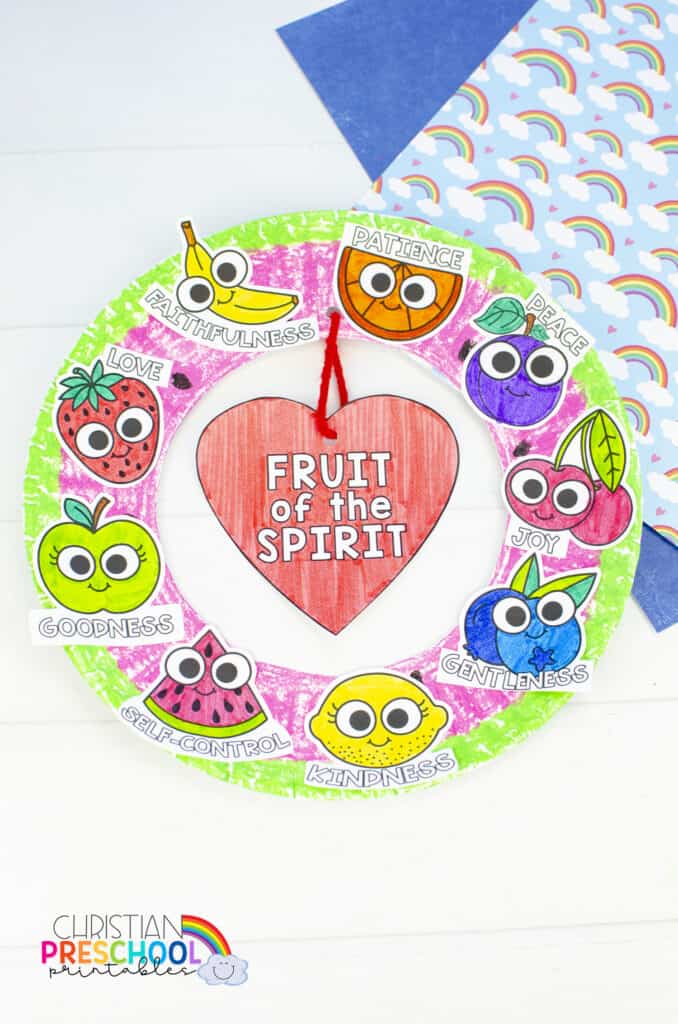
In this Fruit of the Spirit craft for kids, we’ve designed a colorful wreath that can be completed in 8 easy steps. We’ve got a step by step tutorial below along with a fun and quick video to watch. These adorable fruits will help teach students important character concepts while having fun.

Fruit of the Spirit Wreath Craft

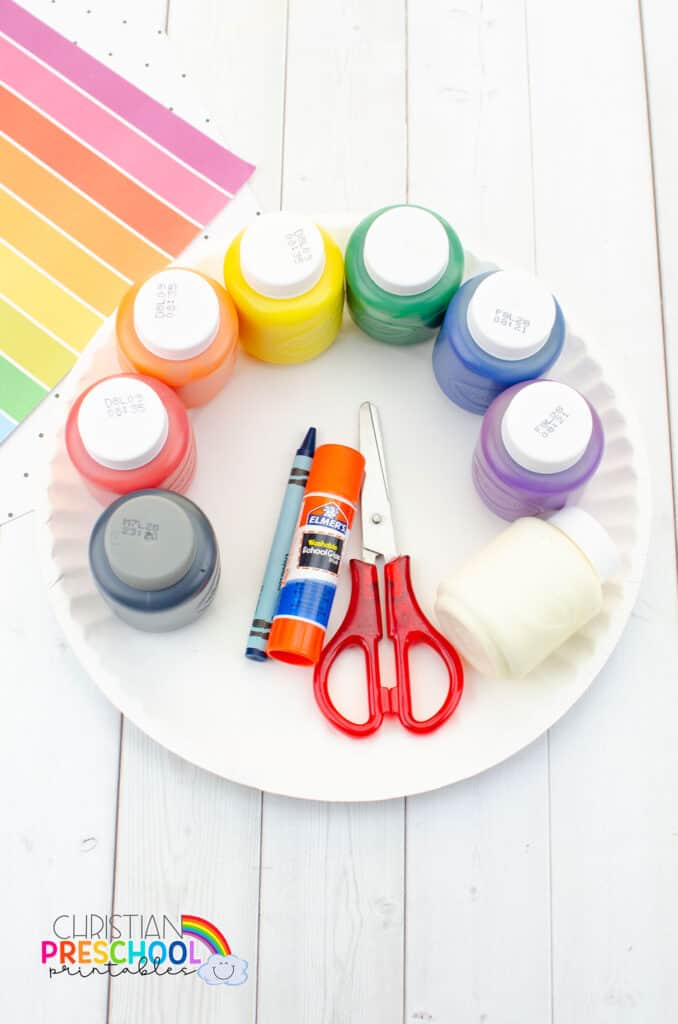
Fruit of the Spirit Craft Supplies

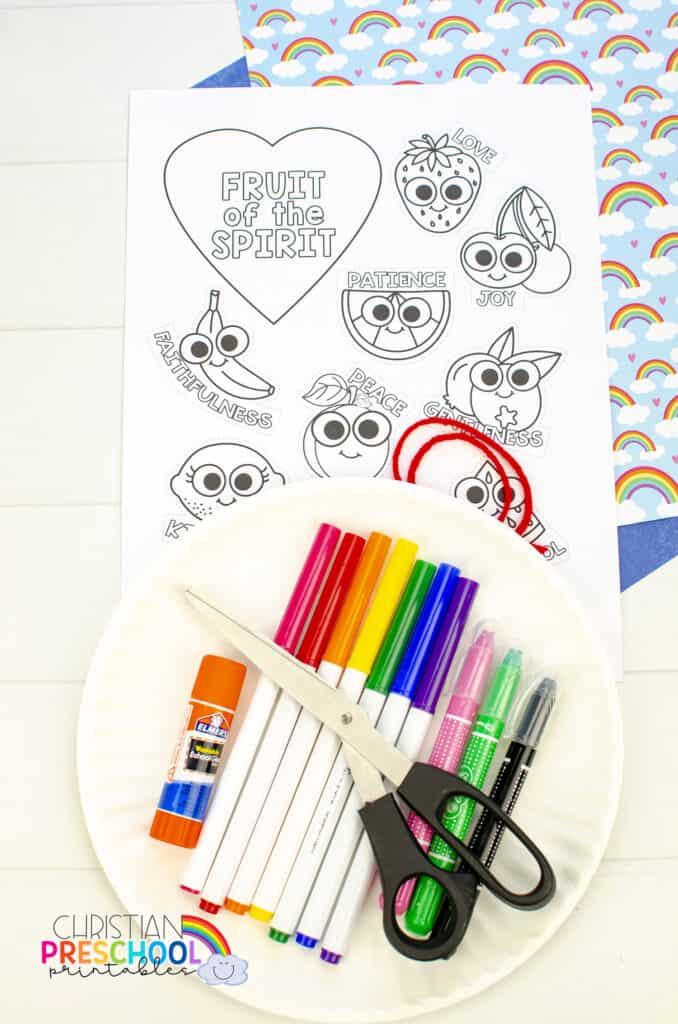
  • Template (available in color or black and white)
  • Paper plate
  • Markers
  • Paint crayons
  • Scissors
  • Glue stick
  • Small piece of red yarn

Fruit of the Spirit Printable Instructions

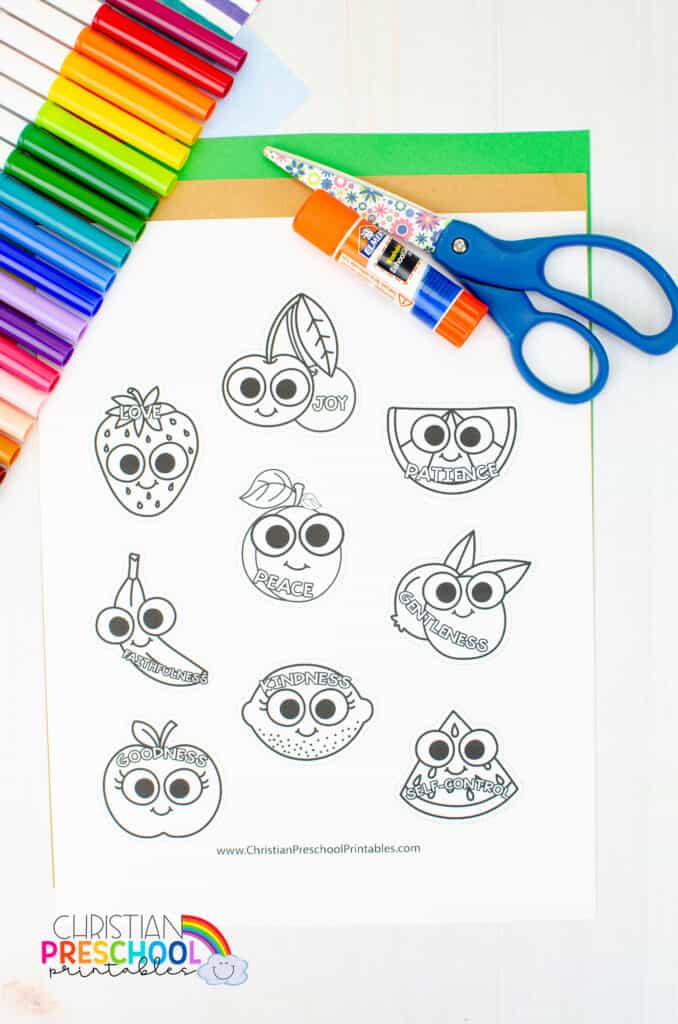
1. First, print out the Fruit of the Spirit template. It is available in color or black and white.

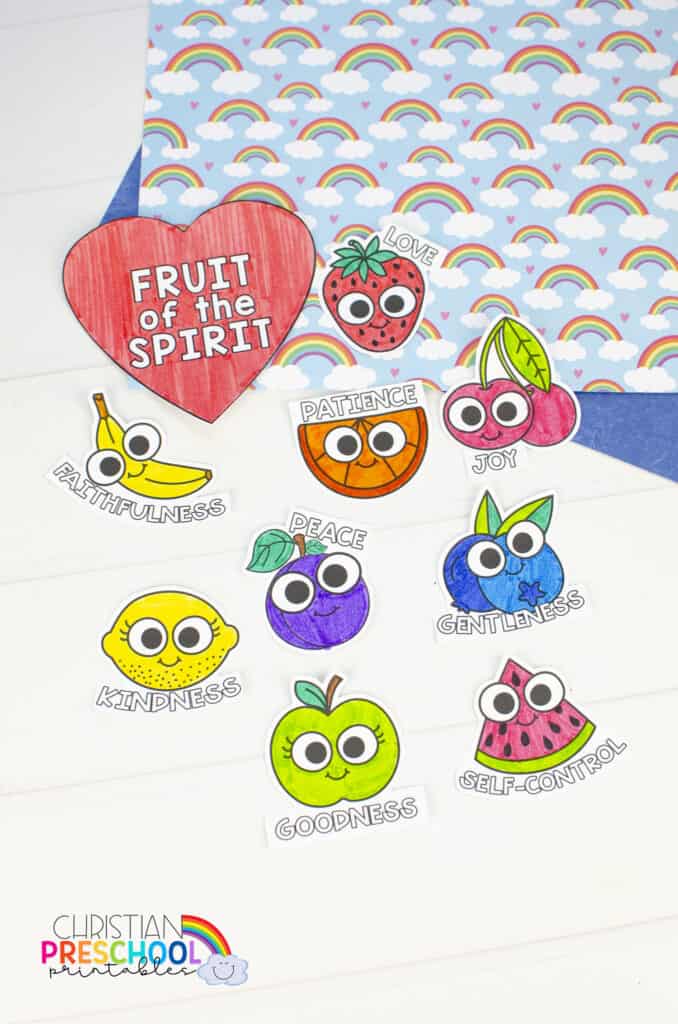
2. If you choose the black and white template, then color the pieces with markers.

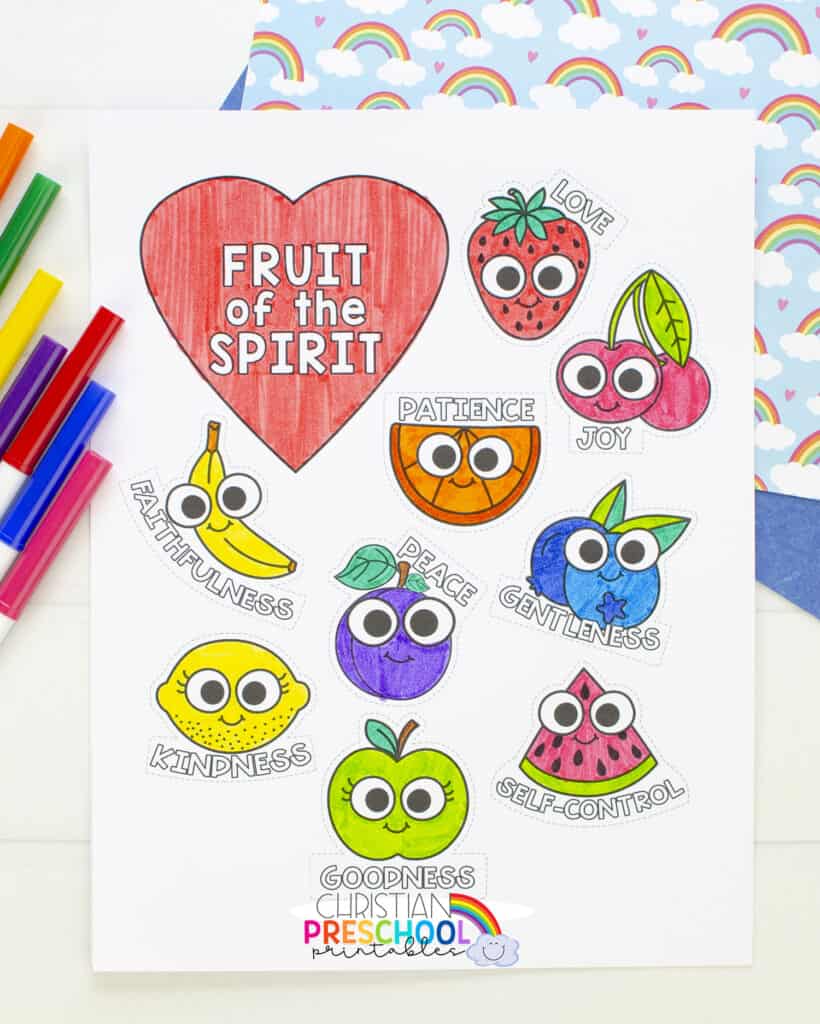
3. Now cut out all of the template pieces.

4. Grab the paper plate and cut out the middle to make a wreath form.

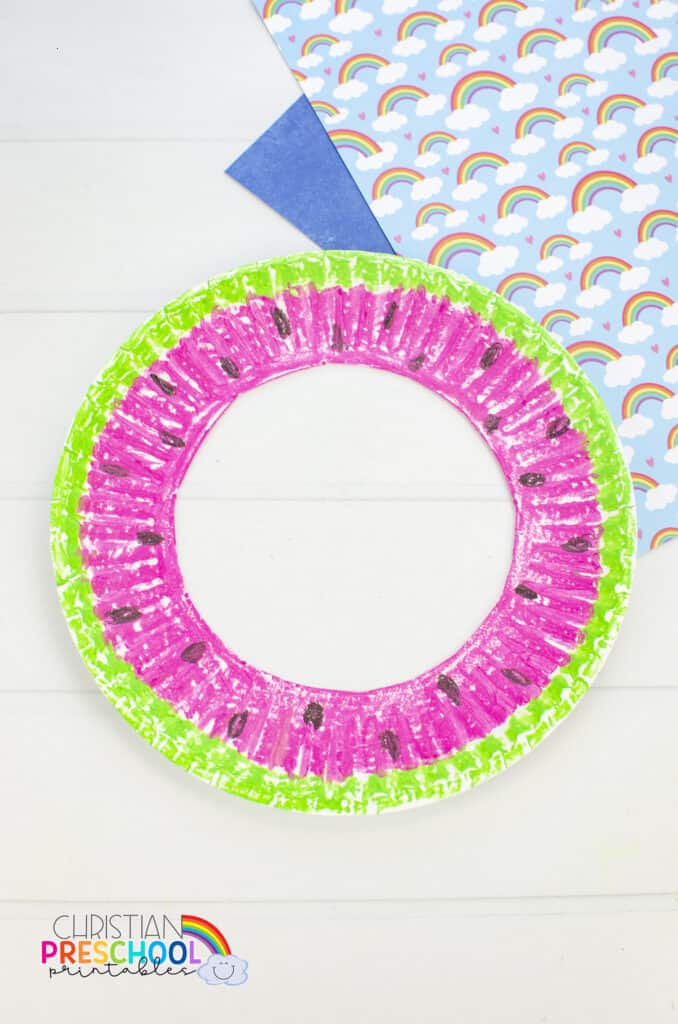
5. Next, use the paint crayons to color the paper plate to look like a watermelon. Color lime green around the edge, followed by pink. Then finish it with some black ovals to act as watermelon seeds.

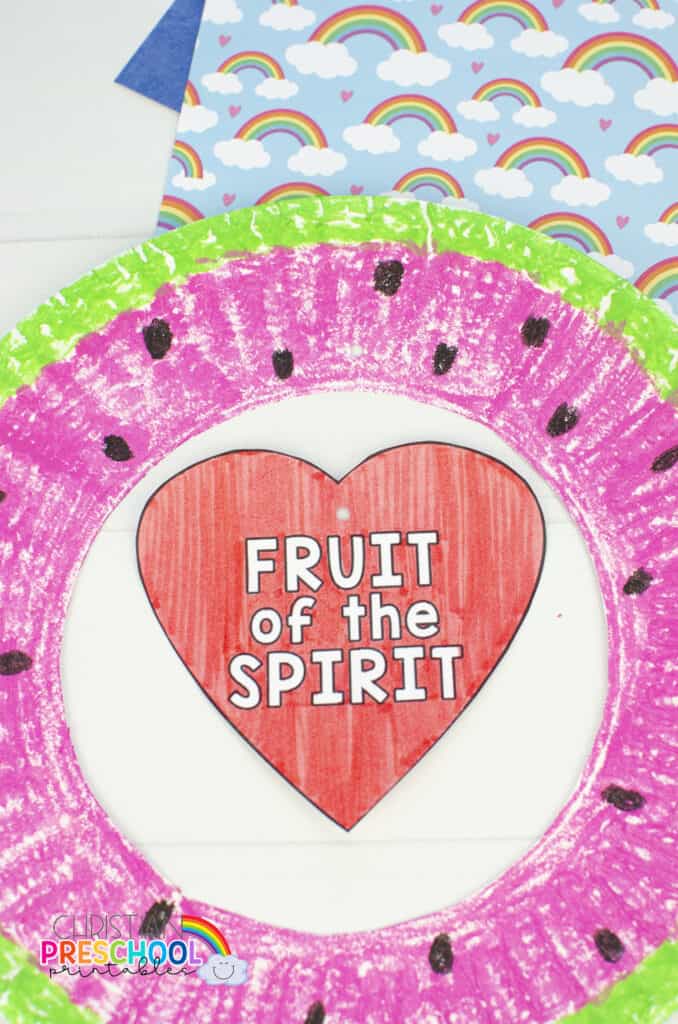
6. Use the hole punch to make holes on the plate and template heart.

7. String the red yarn through both holes and make a double knot to secure. Cut the loose ends.

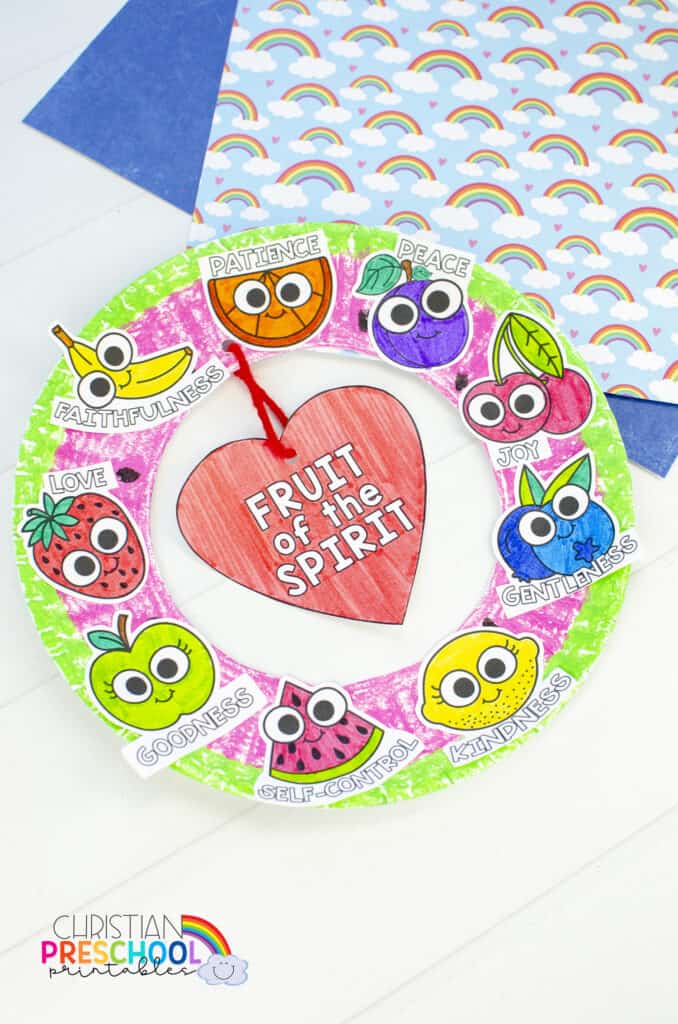
8. To finish the craft, glue the fruits around the wreath.

The Fruit of the Spirit bible craft is complete!

Fruit of the Spirit for Kids

If you’d like to teach your kids about Fruit of the Spirit, don’t miss out on our fun and fabulous Fruit of the Spirit Bible Activity Pack! This hands-on teaching resource is a simple way to add engaging projects, worksheets, crafts, activities, Bible memory, Christian character, and more to your Fruit of the Spirit Bible lesson.

What are the Fruit of the Spirit?

Here is a complete list for the 9 Fruit of the Spirit in bible verse Galatians 5:22-23 (ESV):

  • Love
  • Joy
  • Peace
  • Patience
  • Kindness
  • Goodness
  • Faithfulness
  • Gentleness
  • Self-Control

Teaching these 9 spiritual fruits are much easier when you have a hands-on lesson to help them understand a more difficult subject. Basically, Spiritual fruits are produced by the Holy Spirit when we commit ourselves to Him. Not being able to see the Holy Ghost and comprehend it easily can be a struggle for young children.

However, with this fun and creative visual bible craft, you’ll be ensured a more engaging way to educate your child on the spiritual gifts he gives us when we are in the Spirit.

This is one of my favorite Fruits of the Spirit Bible crafts because it is a great visual representation and application of the Fruits of the Spirit. As you complete this project with your students, teach them that God intended their “Hands” for love, peace, kindness, goodness etc….. that as they respond to situations in life they can pick a fruit or two to respond with.

Fruit of the Spirit for Kids Craft Supplies

  • Fruit of the Spirit Template
  • Brown cardstock
  • Green cardstock
  • Markers
  • Scissors
  • Glue stick

Fruits of the Spirit Bible Craft:

1. First, print out the Fruit of the Spirit templates. Use the colored version or use markers to color all the fruits. If you’d like more durability, you can print the fruits and the template on cardstock paper.

2. Cut them all out.

3. First trace the child’s hand and arm on brown cardstock. Cut it out.

4. Take the tree template and cut it out. Trace it on green paper and cut it out again.

5. Then glue the hand to the green paper so it looks like the arm is the tree trunk and the hand and fingers are its branches.

6. Finally glue the Fruits of the Spirit to the tree.

The Fruits of the Spirit Bible Craft Tree is complete! How adorable is this!? Your Sunday School students will have this beautiful keepsake to take home and share the fruits with their family and friends. Remind them to “pick” a few fruits for the day!

More Fruits of the Spirit Bible Crafts

Our Fruits of the Spirit Bible Activity Pack is FILLED with Fruitful craft projects and activities for all ages! Check them out today!

Fruit of the Spirit Bible Crafts for Kids

Our Fruits of the Spirit Bible Crafts are great for Sunday School Lessons or Homeschool Unit Studies. These colorful and hands-on activities are low-prep and highly engaging, making them the perfect accompaniment to your Fruit of the Spirit Bible Lessons.

Learning about the Fruits of the Spirit is one of the most FUN and EXCITING Bible lessons you can teach in your Sunday School classroom or VBS. There is something just so fun about these adorable fruits, and best of all these activities will help you teach your students important character concepts that will stick! We’ve created a variety of projects that can be used with students of all ages.

Fruits of the Spirit Craft

This is one of my favorite Fruits of the Spirit Bible crafts because it is a great visual representation and application of the Fruits of the Spirit. As you complete this project with your students, teach them that God intended their hands for love, peace, kindness, goodness etc….. that as they respond to situations in life they can pick a fruit or two to respond with.

Fruit of the Spirit Cereal Craft

When it comes to your Preschool Sunday School classroom, it doesn’t get more fun than fruity cereal! Your kiddos will enjoy snacking on these fruity bites and they work on simple fine motor skills. Try this Fruit of the Spirit Cereal Craft today!

Fruit of the Spirit Wreath Bible Craft

Older students will enjoy this Fruits of the Spirit Paper-Plate Wreath Bible Craft, and it couldn’t be simpler to set up in your classroom. Students will use our Fruits of the spirit printables to decorate their watermelon wreath! These colorful wreaths are great for take-home activities as well. Students can hang them on their bedroom door as a gentle reminder to choose the fruits of the spirit.

Fruit of the Spirit Basket Craft

This is a fun hands-on Bible craft where students will make their own Fruit of the Spirit Basket to store all their fruits! This Bible craft is extra fun with Popsicle sticks and wiggle eyes if you have them! We’ve included all the templates in our Fruits of the Spirit Bible Activity Pack to make things super simple for you to get started.

Fruit of the Spirit Pie Wheel Craft

Who doesn’t LOVE Fruit pie? Fruit of the Spirit Pie that is! This is an extra simple project that would be great for your younger preschool students. They can color the levels of the pie and you can help them assemble it into a wheel. Each turn of the wheel reveals a new fruit of the spirit. What a FUN way to help your students remember these important and biblical character traitss!.

Creation Crafts & Activities

Learning the days of creation is fun with our Creation Bible Crafts and activities. These crafts has been developed to help you teach your little ones the seven days of creation while having fun! We also have a variety of Creation Bible Printables and Creation Coloring Pages you can use alongside these crafts to round out your Creation Bible Lesson.

7 Days of Creation for Kids

This printable creation Bible craft for preschoolers is simple enough to do in a homeschool or Sunday School classroom setting. Using paper plates, watercolors and our free printable days of creation template, your students will have a fun and interactive Bible memory resource they can use to retell the story of creation.

Days of Creation Bible Craft For Kids

This is a days of creation craft for older students or for when you have a little more one-on-one time available for your younger students. There are eight different creation circles for students to color and decorate. Each day is put into order, folded and glued together to make a creation ball! Students can flip from day to day to view the creation story.

Days of Creation Book Craft for Kids

This is a wonderful Creation craft for homeschool students or for when you are teaching the days of creation over multiple Sundays. For each page in this book, students create a visual representation of what God created on that day. Each picture can easily be made with colorful cup-cake liners. This is another great project for older kiddos or for when you have more adult assistance.

Days of Creation Bible Activity Pack

This Creation Activity Pack is the perfect accompaniment to your Creation Bible lessons! K-5 students will find lots of fun hands-on activities, games, scripture tools, copywork pages, mazes, worksheets, activity pages, craft projects and more! Includes fun take-home resources for students to memorize the seven days of creation.

Noah’s Ark Crafts

Your Sunday School students will be thrilled with these Noah’s Ark Bible Crafts! We’ve created a variety of fun, hands-on, and interactive Bible crafts and activities you can use when learning about Noah’s Ark. These crafts use minimal materials so you won’t spend your weekend tracking down supplies! Best of all, we have Noah’s Ark Crafts for students of all ages and abilities, not just preschool! If you are looking for more Noah’s Ark Bible Printables, we have some more Bible Lesson Planning resources here!

Noah’s Ark Preschool Craft

This printable Noah’s Ark Preschool Craft is just right for little ones who are learning that the animals were put on the ark 2-by-2! Students color the rainbow, the ark, and the animals. The layers are assembled with a brad and students can turn the wheel to show each of the animals entering the ark. This is a fun way to help young children remember their Noah’s Ark Bible lesson.

Noah’s Ark Rainbow Craft

This Noah’s Ark Craft is great for younger students who are learning all about God’s Rainbow Promise! Each of the colors of the rainbow are created with finger paint! This can be a bit messy with a large group of students, you can adapt this project by using specialty paint brushes/sponges, or even Bingo Dab Markers.

Noah’s Ark Bible Lesson Craft

This Noah’s Ark Bible Craft is perfect when paired along side a Bible Lesson! In fact, you might create one as a visual for your circle time stories as you retell the story of the 40-days and nights of rain. Your Sunday School students will be thrilled to create their own during craft time, and they can bring these helpful memory tools home to retell the story to their friends and family.

Noah’s Ark Paper Plate Craft

This Noah’s Ark paper plate craft is great for when you have a small group! There is lots of hands-on fingerprinting and even hand-printing to make the ark. These activities require more parental/teacher involvement but the results create a beautiful Bible keepsake your families will treasure for years to come.

Noah’s Ark Sunday School Craft

If you have a little more time for your Noah’s Ark Bible Craft, then this is a HUGE winner to try! This craft includes lots of hands-on creativity with different colored tissue paper! Students create a tissue paper rainbow and ark to make this moveable wheel! Best of all, students add a heart to the ark that reads, “God keeps his promises.”

Noah’s Ark Bible Printables

If you are looking for more resources for your Noah’s Ark Bible Lesson, be sure to check out our Free printables! We have some fantastic teaching resources you can use in your Sunday School classroom. You’ll find Noah’s Ark Bingo, Puzzles, Bible Verse Coloring pages, Classroom Verse Charts, Matching Games and more! Best of all these Noah’s Ark Resources are FREE!

Rainbow Craft Preschool Themed Activity

The rainbow is a beautiful reminder of God’s promise to us. It’s also a great tool to use to teach your children of God’s love and amazing attributes. We have another easy rainbow craft that involves more simple materials found at home or classroom.

Plus, with a step by step visual guide and a video tutorial, you can’t go wrong with this craft. Whether you need a rainbow or Noah’s ark bible craft for home, classroom, camp, or Sunday School, our Rainbow Craft Preschool Themed Activity can be put together easily. And, this one is extra fun using handprints and fingerprints from your precious kids!

Rainbow Craft for Kids with Paint and Popsicles

Rainbow Craft Supplies

  • Rainbow Craft Template
  • Paints: all colors of the rainbow
  • White, Blue and brown cardstock
  • Scissors
  • Glue
  • Tape
  • Popsicle stick

Rainbow Preschool Theme Craft Instructions

1. First print the rainbow craft template on the white cardstock.

2. Then starting with red, make fingerprints with the paint along the first rainbow row. Repeat with all the colors of the rainbow going a row inward with each color.

3. Now take the brown paper and trace the child’s hand with all the fingers tucked in to create an ark.

4. Cut the handprint out and tape or glue the popsicle stick to the back.

5. Next cut a strip of blue paper about 3” wide. Now cut a wave pattern from one of the edges.

6. Now glue only the sides of the blue paper to the rainbow template, leaving the top and bottom open.

7. Now place your handprint ark in the ocean and use the popsicle stick to move it back and forth! The craft is complete!

Show children how to move the stick to make the boat float in the water:

[adthrive-in-post-video-player video-id=”a1ZwTduA” upload-date=”2020-05-31T01:10:39.000Z” name=”Noah’s Ark Bible Craft” description=”null” player-type=”default” override-embed=”default”]

Looking for more Rainbow or Noah’s Ark Crafts that are super easy and adorable to make? Try these…

  • Rainbow Craft for Kids
  • Noah’s Ark Craft Spinner
  • Noah’s Ark Craft for Preschoolers
  • God Keeps His Promise Rainbow Craft
  • Noah’s Ark Rainbow Plate Flap Craft

Crafts for Noah’s Ark: Spinner Animal Activity

[adthrive-in-post-video-player video-id=”hy50CgVi” upload-date=”2020-05-25T13:00:00.000Z” name=”Noahs Ark & The Animals Bible Craft” description=”Help Noah load the animals with this FREE Bible Craft” player-type=”default” override-embed=”default”]

We’ve got more fun and free bible resources for you — you’ll find even more crafts for Noah’s Ark Spinner style! If you’re a school teacher, homeschool mom, working mom, or a stay at home mom, we’ve got you covered! With all of our crafts low prep and few materials needed, it’s a no-brainer!

A great idea for a preschool theme is teaching about Noah’s Ark or Rainbow promises. And, with this handy free bible craft, you’ll have the kids learning and enjoying their creation all at the same time. With just 4 easy steps, tutorial, and video visual, your child(ren) will have this craft ready in no time. Hands-on activities are great for preschoolers and little ones. It gives them an opportunity to use all of their senses while learning about our Creator.

Free Crafts for Noah’s Ark Supplies

  • Template
  • White cardstock
  • Washable Markers
  • Brass fastener
  • Scissors

Noah’s Ark Craft with Spinner Instructions

1. First print the Noah’s Ark template on white card stock.

2. Then color both pages with the markers or opt for the colored template.

3. Now cut both template parts out. Cut out the rectangle shape on the ark template, this creates a little window to view the animals from underneath.

4. Next poke the brass fastener through both the template and the dot, secure on the back.

The free Noah’s Ark animal spinner is complete. Spin the back circle to see each animal pair board the ark!

Looking for more Rainbow or Noah’s Ark Crafts that are super easy and adorable to make? Try these…

  • Rainbow Craft for Kids
  • Noah’s Ark Craft Spinner
  • Noah’s Ark Craft for Preschoolers
  • God Keeps His Promise Rainbow Craft
  • Rainbow Craft Preschool Themed Activity

Noah’s Ark Rainbow Craft for Kids

[adthrive-in-post-video-player video-id=”zYziUgfd” upload-date=”2020-05-11T13:00:00.000Z” name=”Noah’s Ark Flip-Flop Paper Plate Craft” description=”Create this fun visual to retell the story of Noah’s Ark” player-type=”default” override-embed=”default”]

Easy crafts that are creative and not kill the budget are a perfect solution for schooling at home, homeschooling, church camp, and Sunday School. We’ve been sharing a lot of adorable rainbow crafts as a Noah’s Ark theme on God’s promises. Here’s an innovative rainbow craft for kids that will keep them occupied for the entire class.

With only 5 materials you can find at home or church, plus, 8 step by step instructions, you’re guaranteed a successful and peaceful craft time. This is a great bible craft for camp, especially outdoors, where they can get a little messy and clean up is a breeze. Remember to remind the kids what the rainbow means — God’s promise that He will never flood the earth again. What a wonderful and beautiful promise sign!

Rainbow Craft Handprint Flip Supplies

Grab some paper plates, crayons, paints, scissors, and a glue stick before you get started. The Rainbow Craft materials and instructions are below.

  • 2 Paper plates
  • Blue crayon
  • Paints
  • Glue stick
  • Scissors

Rainbow Craft Instructions Step by Step

1. First color the bottom half of the concave side of one plate with the blue crayon or colored pencil to make the water. Don’t use a marker, the painted handprint on top will make the marker bleed.

2. Paint the child’s hand brown and make a print on the water to create an ark.

3. While you wait for that to dry, take the other plate and cut it in half.

4. Now fold that piece in half and draw a line with a pencil on the convex side. Take the plate with the ark and draw a line down the middle top half as well.

5. Next, make a fingerprint rain cloud with gray paint and fingerprint raindrops with blue paint on the left side of the pencil line on the ark plate.

6. Make a rain cloud and raindrops to the right convex side of the plate half as well. Allow time to dry.

7. Once dry, flip the plate half over to the concave side. Have the child make a fingerprint rainbow by starting with red along the edge and move inward with each color.

8. Once that is dry, fold the half plate and place glue on the back of the right side (the only part that isn’t painted). Stick it to the ark plate on the right side of the top (the only part that isn’t painted).

Now the child can flip from rainy to rainbow!

Looking for more Rainbow or Noah’s Ark Crafts that are super easy and adorable to make? Try these…

  • Rainbow Craft for Kids
  • Noah’s Ark Craft Spinner
  • Noah’s Ark Craft for Preschoolers
  • God Keeps His Promise Rainbow Craft

Noah’s Ark Craft Spinner for Kids

This bible activity is a Noah’s Art Craft is super easy to assemble in your home or Sunday School! It only has 4 easy steps, plus, we’ve included a short video and step by step instructions. You can’t go wrong with this super cute craft!

If you are teaching about Genesis and Noah’s ark or Noah’s flood, this bible craft is the perfect way to learn about Noah, his ark, animals, and the valuable lessons behind it. Plus, the materials are easy to find in your house or church. Let’s get right to it…here’s your easy-to-assemble Noah’s Ark Craft for Kids Spinner.

Noah’s Ark Craft Spinner

Noah’s Ark Supplies

  • Noah’s Ark Craft Spinner Template
  • White cardstock
  • Markers
  • Brass fastener
  • Scissors

Noah’s Ark Instructions

1. Print Noah’s Ark Spinner template (cardstock). Download B & W
2. Then color both pages or opt for the colored template.Download Color

3. Now cut both template parts out.

4. Poke the brass fastener through both parts in the center where the dot is. Spread the two tongs on the back of the fastener to secure.

Your Noah’s Ark Weather spinner is complete, spin the back circle to reveal the rainbow or rain!

Need more Noah’s Ark bible crafts for kids? Click on the image below for another fun and easy craft to teach about God’s promises!

Noah’s Ark Craft for Preschoolers

[adthrive-in-post-video-player video-id=”tD2TM67D” upload-date=”2020-05-04T13:00:00.000Z” name=”Noah’s Ark Tissue Paper Bible Craft” description=”Try this Coloful Noah’s Ark Bible Craft Today!” player-type=”default” override-embed=”default”]

Noah’s Ark Craft Instructions

Looking for some fun and free bible crafts that are all about Noah’s Ark and the flood? Whether you are a Sunday School teacher, homeschool mom, working mom, or a stay at home mom, we’ve got you covered! You are going to love our tissue paper Noah’s Ark craft that requires very little prep on your part!

Teaching about the amazing 40-day journey of Noah and his family is so much easier when a hands-on activity is available. It gives children an opportunity to use all of their senses while learning about God’s amazing miracles.

Noah’s Ark Bible Craft Supplies

  • Two paper plate
  • Brass fastener
  • Tissue paper; rainbow colors plus brown.
  • Noah’s Ark Template
  • Crayons; red and gray
  • School glue
  • Small paintbrush
  • Scissors

Noah’s Ark Craft Instructions

1.First take each color of tissue paper and cut into pieces.

2. Then grab a paper plate, draw a line down the center of the plate to separate the rain side from the rainbow side.

3. Let’s work on the rainbow side first. Take the school glue and squeeze some along the border of one side of the plate. Use the paintbrush to spread the glue around. Glue red pieces of tissue paper along the edge of the plate. Take the paintbrush and spread some glue over the top of the red pieces, making sure to get all edges down.

4. Then glue orange pieces a little further into the center of the plate. Proceed with all the colors of the rainbow. Make sure all edges are sealed down so the plate can turn without getting stuck.

5. Now print the Noah’s Ark template. Color the two clouds without the dashed line gray and the heart red. Cut out all the template pieces. Also cut down the dashed line on two of the clouds.

6. Then take the 4 cloud pieces (the half cloud shapes) and glue them to the bottom of the rainbow. Make sure they are above the line separating the two halves.

7. Next turn the plate so the rainbow is on the bottom, this blank half will have the rain.

8. Glue the two gray clouds toward the top of the plate. Then glue a bunch of the blue tissue paper pieces for the rain. Take the paintbrush and spread glue over the tops of the blue tissue paper pieces to make sure they are sealed down.

9. Now take the other plate and cut an ark shape. You’ll want to cut the sides to be an even line with half the plate, the ‘house’ part on the top can be any size.

10. Then take brown tissue paper and cut it into pieces.

11. Next take pieces of brown tissue paper and using glue and a paintbrush, stick onto the ark shaped plate.

12. Once the whole ark is covered, use the paintbrush and a little more glue to seal in all the edges.

13. Take the heart and glue it to the ark.

14. Once everything is dry, align the plates and poke a hole in the center of both plates. This can be done by an adult with a craft knife or the tip of scissors.

15. To complete the craft, put the brass fastener through the ark then through the rainbow/rain plate and fasten on the back.

You are finished! Now you can spin the plate to go from rainy to rainbow.

Need more bible craft ideas? Try our rainbow crafts for kids!

  • Page 1
  • Page 2
  • Page 3
  • Interim pages omitted …
  • Page 7
  • Go to Next Page »

Primary Sidebar

Preschool Curriculum

Bible ABC Curriculum

Homeschool Curriculum


Secondary Sidebar


Bible Alphabet
Bible Bingo
Bible Bookmarks
Bible Calendar
Bible Coloring
Bible Crafts
Bible File Folder
Bible Lessons
Bible Games
Bible Holiday
Bible Minibooks
Bible Puzzles
Bible Verse Cards
Bible Wordwall
Bible Worksheets
Bible Curriculum
Bible Songs


BIBLE HOLIDAY PRINTABLES New Years
Valentine's Day
St. Patrick's Day
Easter
Earth Day
Mother's Day
Father's Day
Fourth of July
Halloween
Veteran's Day
Thanksgiving
Christmas

Preschool Bible Curriculum:

Bible ABC
Fruits of the Spirit
Ten Commandments for Kids

Footer

HELPFUL LINKS

  • Contact Us
  • Terms of Use
  • Privacy Policy
  • Cookie Policy
  • Affiliate Disclosure

SUBSCRIBER FREEBIE

Join over 100,000 subscribers and receive our free teaching newsletter! Join FREE today!

Copyright 2023 Valerie McClintick LLC